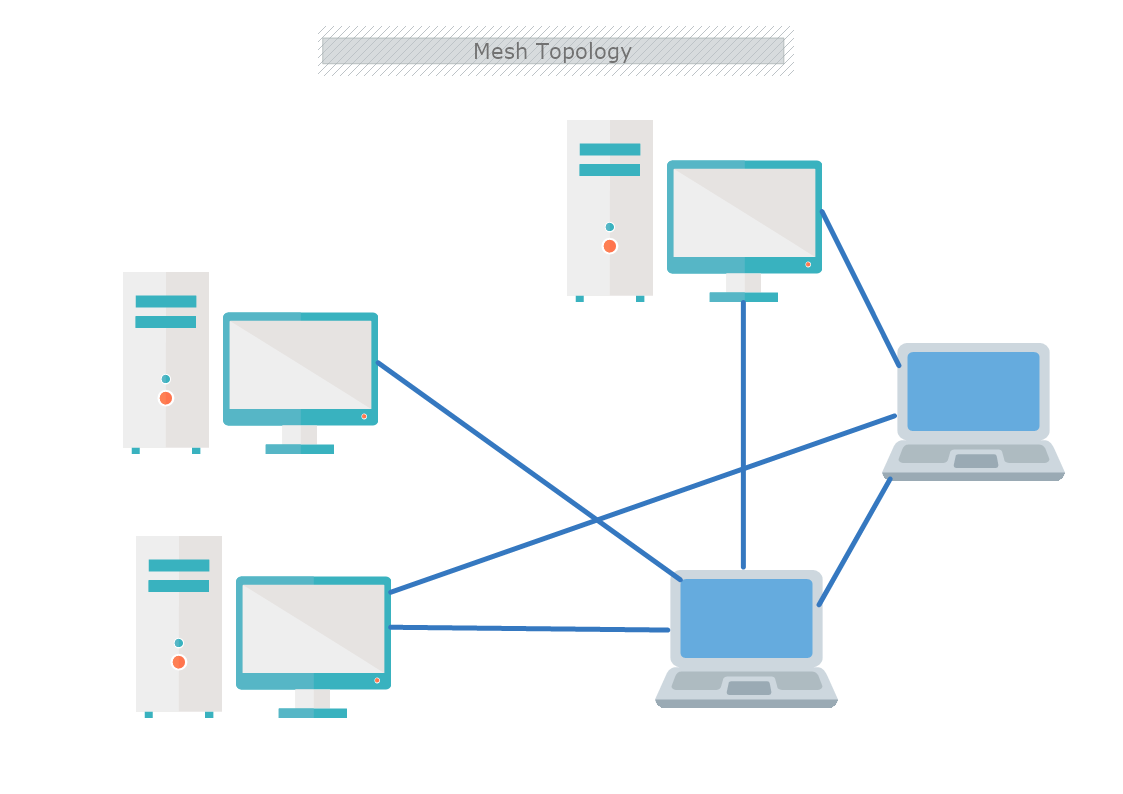
This is a Mesh Topology template that shows how all nodes in a network are connected to all other nodes in the network. The template is 100% customizable and you can edit every aspect of it with a few simple clicks in MyDraw.
Download Template:


Download Template:
The structure of the Mesh topology is suitable and reliable for high loads. As this type of network topology is such that it can efficiently manage traffic effortlessly. This is due to the multiple nodes involved. Since there are various nodes, it can handle a high level of traffic when the setup is complete and correct.
Advantages of the Mesh topology
- Handles a high level of traffic- it does not have a hierarchical relationship.
- The single failure of one device does not affect the network.
- Data transmission is consistent, as failure in the network does not disrupt the process.
- Data transmission is not affected by adding of new devices.
- Mesh topology does not require additional routers. Each node acts as an individual router.
- Mesh Topology is easy to add, as the only connection between the nodes to the gateways has to be made. In this way, the messages can pass through to the remaining network.
- It is very difficult to take down the network.
- No need for a centralized authority.
- Flexibility
- The management of a high volume of data is seamless.
Disadvantages of the Mesh topology
- Higher cost for implementation.
- The mesh topology is time-consuming to build and maintain.
- Higher risk of redundant connection.
- Increase of workload of each node.
- Mesh Topology does not have the processing capacity to handle data transfers promptly.
How to create a Mesh Topology Network Diagram in MyDraw?
- Edit the ready-made template or Open a “Blank Drawing” file to create your own.
- From Library Gallery> Networking select the respective folder.
- From Library Gallery use the search library to find more networking shapes, suitable for your template.
- Once you have checked and marked the shapes they will be loaded on the left side of your drawing panel.
- Drag and drop the shapes you would like to use into the drawing. Name the items in your network diagram.
- Use the connector tools to arrange your diagram. Draw connections between components.
- To add fill you can edit the Geometry Fill and Stroke from the Ribbon.
- In the Ribbon, you can select the Design tab to choose from a variety of shape styles and theme colors.
- Add a title and share your network diagram.
- Save the document in one of MyDraw’s native formats or export it in a preferred file format( PDF, SVG, EMF, VSDX, etc.).
- You can also export the document as a raster image.
